Easy Cheesy Rice Recipe: Creamy, Flavorful, and Ready in 25 Minutes

There’s something magical about a steaming bowl of cheesy rice that makes everything feel right in the world. Maybe it’s the way the cheese melts into every grain, or how it transforms plain rice into pure comfort food. Whatever it is, you’re here because you want to know how to make it, and I’m going to show you exactly that.
Making cheesy rice is incredibly simple. You cook rice, stir in your favorite cheese while it’s still hot, add a bit of butter or cream, and season to taste. The whole process takes about 25 minutes from start to finish. But here’s the thing: while the basic recipe is straightforward, knowing a few key techniques will take your cheesy rice from good to absolutely incredible. Whether you’re looking for a quick weeknight side dish or planning to impress guests with a creamy rice casserole, this guide covers everything you need to know.
I’ve made cheesy rice hundreds of times, tweaked the recipe countless ways, and learned what works and what doesn’t. By the end of this article, you’ll know how to make restaurant-quality cheesy rice at home, customize it to your taste, and avoid the common mistakes that lead to clumpy, grainy, or bland results. Let’s get started.
What Makes Cheesy Rice So Special
Cheesy rice sits at that perfect intersection of comfort and convenience. It’s the dish that saves dinner when you’re short on time but still want something satisfying. Parents love it because kids actually eat it without complaints. College students appreciate how affordable and filling it is. And honestly, even the pickiest eaters usually give it a thumbs up.
The beauty of this dish lies in its versatility. You can serve cheesy rice as a side dish alongside grilled chicken or steak. Add some vegetables and protein, and it becomes a complete meal. It works for casual Tuesday dinners and fancy holiday gatherings alike. Plus, you probably already have most of the ingredients sitting in your kitchen right now.
What really sets a great cheesy rice recipe apart is the texture. You want rice that’s fluffy and tender, not mushy or sticky. The cheese should coat every grain without turning into a clumpy mess. And the overall dish needs to be creamy enough to feel indulgent but not so heavy that you need a nap afterward.
The cheese selection matters more than most people realize. Different cheeses melt differently, taste different, and create different textures. Sharp cheddar gives you that classic cheesy flavor everyone recognizes. Monterey Jack melts beautifully smooth. Cream cheese adds incredible richness. Parmesan brings a nutty, salty depth. Many of the best cheesy rice recipes use a combination of two or three cheeses to get the perfect balance of flavor and texture.
Temperature plays a crucial role too. Adding cheese to rice that’s too cool means the cheese won’t melt properly. You’ll end up with cold chunks of cheese mixed with warm rice, which nobody wants. On the flip side, if your rice is boiling hot and you add the cheese too quickly, it can seize up and turn grainy. The sweet spot is hot rice with the heat turned off, giving you just enough warmth to melt the cheese smoothly.
Choosing the Right Ingredients for Your Cheesy Rice Recipe
Let’s talk about what you actually need to make amazing cheesy rice. The ingredient list is short, but each component matters.
The Rice
Long grain white rice is your best friend here. It cooks up fluffy with distinct grains that don’t clump together. Jasmine rice works wonderfully and adds a subtle fragrance. Basmati rice is another excellent choice, especially if you’re going for a more aromatic dish.
Medium grain rice is fine if that’s what you have on hand. It’s slightly stickier than long grain, which can actually work in your favor for a creamier cheesy rice casserole. Short grain rice gets pretty sticky and clumpy, so I’d save that for risotto or sushi instead.
Can you use brown rice? Absolutely. It takes longer to cook (about 45 minutes instead of 15-20), and the texture is chewier and nuttier. Brown rice also has more fiber and nutrients, making it a healthier option. Just know that the final dish will have a heartier, less delicate texture than white rice versions.
Instant rice is the fastest option if you’re really pressed for time. It’s already partially cooked, so you just need to heat it with water for about 5 minutes. The texture isn’t quite as good as regular rice, but it gets dinner on the table fast.
The Cheese
This is where you can really customize your cheesy rice recipe to match your preferences.
Cheddar cheese is the classic choice for good reason. Sharp cheddar packs serious flavor, while mild cheddar is gentler for kids or sensitive palates. Pre-shredded cheddar is convenient, but freshly grated cheese melts much better because it doesn’t have the anti-caking additives that pre-shredded varieties contain.
Monterey Jack cheese melts like a dream. It’s mild and creamy, making it perfect for creating that smooth, velvety texture. Pepper Jack adds a nice kick if you want some heat in your dish.
Cream cheese isn’t technically necessary, but adding a few tablespoons transforms your cheesy rice into something ridiculously creamy. It helps bind everything together and adds richness that regular cheese alone can’t achieve.
Parmesan cheese brings umami and a sophisticated edge. Use it alongside other cheeses rather than by itself, since Parmesan alone can taste a bit too sharp and salty for most people’s liking.
Mozzarella is great for that signature cheese pull, though it doesn’t add much flavor. Mix it with cheddar or Parmesan for the best of both worlds.
For the creamiest results, I recommend using a combination. My go-to mix is 2 cups sharp cheddar, 1 cup Monterey Jack, and 2 tablespoons of cream cheese. This gives you flavor, meltability, and creaminess all in one bowl.
Liquids and Fats
You need liquid to cook the rice, obviously. Most people use water, and that works fine. But using chicken broth or vegetable broth instead adds another layer of flavor that makes your cheesy rice taste more complex and satisfying. The difference is noticeable.
Butter makes everything better, and cheesy rice is no exception. A couple tablespoons stirred in at the end adds richness and helps the cheese melt smoothly. Some recipes call for heavy cream or milk as well. These aren’t essential, but they do create an extra creamy sauce that coats the rice beautifully.
Seasonings
Salt and pepper are the basics. But don’t stop there. Garlic powder adds savory depth without the hassle of mincing fresh garlic. Onion powder brings sweetness and complexity. A pinch of paprika gives subtle warmth and a bit of color.
If you’re making a Mexican-style cheesy rice, cumin and chili powder are your friends. For an Italian twist, add dried oregano and basil. The seasonings you choose can completely change the personality of your dish.
The Perfect Classic Cheesy Rice Recipe
Now let’s get to the actual recipe. This is my tried-and-true method that works every single time.
Ingredients
For the rice:
- 2 cups long grain white rice
- 3 cups chicken broth (or water)
- 1 tablespoon butter
- 1/2 teaspoon salt
For the cheese mixture:
- 2 cups sharp cheddar cheese, freshly grated
- 1 cup Monterey Jack cheese, freshly grated
- 2 tablespoons cream cheese
- 3 tablespoons butter
- 1/4 cup heavy cream or whole milk
- 1/2 teaspoon garlic powder
- 1/4 teaspoon onion powder
- 1/4 teaspoon black pepper
- Salt to taste
This recipe serves 6 to 8 people as a side dish, or 4 to 6 as a main course.
Equipment You’ll Need
You don’t need any fancy equipment. A medium saucepan with a lid for cooking the rice. A large mixing bowl or the same pot you cooked the rice in for combining everything. A wooden spoon or spatula for stirring. A cheese grater if you’re grating your own cheese, which I highly recommend.
Step by Step Instructions
Step 1: Cook the rice properly
Rinse your rice under cold water until the water runs clear. This removes excess starch and helps prevent mushy, sticky rice. It takes about 30 seconds and makes a real difference.
Put the rinsed rice in your saucepan. Add the chicken broth, butter, and salt. Give it a quick stir. Bring everything to a boil over medium-high heat. Once it’s boiling, reduce the heat to low, cover the pot with a tight-fitting lid, and let it simmer.
Don’t lift the lid. I know it’s tempting, but resist. Lifting the lid releases steam and can mess up the cooking process. Set a timer for 15 minutes for white rice, or follow the package directions if you’re using a different variety.
When the timer goes off, remove the pot from heat but keep the lid on. Let it sit for 5 minutes. This resting time allows the rice to finish steaming and absorb any remaining liquid. After 5 minutes, fluff the rice gently with a fork.
Step 2: Prepare your cheese mixture
While the rice cooks, get your cheese ready. If you haven’t already, grate your cheddar and Monterey Jack. Measure out the cream cheese, butter, and cream. Have your seasonings within reach.
Here’s a pro tip: let your cream cheese sit at room temperature while the rice cooks. Softened cream cheese blends much more smoothly than cold cream cheese straight from the fridge.
Step 3: Combine everything for creamy perfection
This is the crucial moment. Your rice is hot and freshly cooked. Turn off the heat completely. Add the butter first and stir it in. The butter will melt immediately and start coating the rice.
Now add your cream cheese in small dollops. Stir it in quickly so it melts into the hot rice. Next, sprinkle in the grated cheddar and Monterey Jack. Don’t dump it all in one spot. Spread it over the surface of the rice.
Stir gently but thoroughly. You want to mix everything together without mashing the rice grains. As you stir, the cheese will start melting from the residual heat. Pour in the heavy cream and keep stirring. The mixture should become creamy and smooth.
Add your garlic powder, onion powder, and black pepper. Stir again. Taste it. Does it need more salt? Add a pinch at a time until it tastes just right. Remember, cheese is already salty, so go easy at first.
If your cheesy rice seems too thick, add a splash more cream or milk. If it’s too thin, let it sit for a minute. The rice will absorb more liquid as it rests.
Step 4: Serve immediately
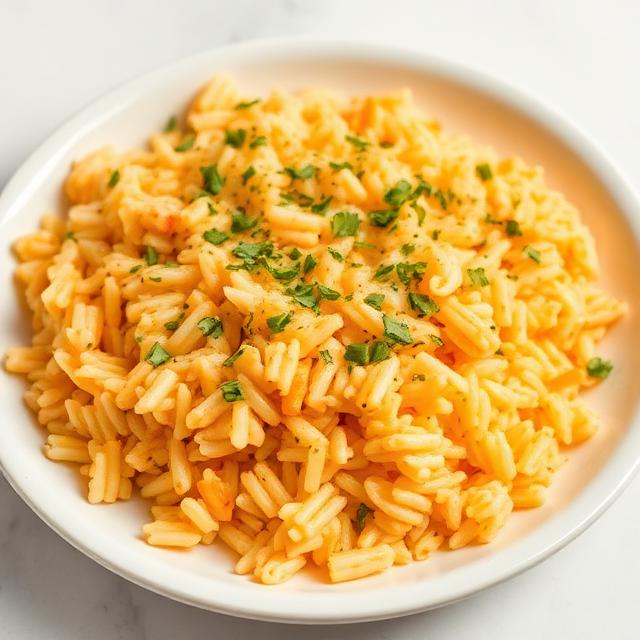
Cheesy rice is best enjoyed right away while it’s hot and the cheese is perfectly melted. Scoop it into bowls or onto plates. If you want to make it look fancy, sprinkle a little extra shredded cheese on top along with some chopped fresh parsley or chives.
Cooking Tips for the Best Results
Getting the cheese to melt smoothly is probably the trickiest part. The key is temperature management. The rice should be very hot but not actively cooking. If the heat is still on, the cheese can seize up and turn grainy. If the rice has cooled too much, the cheese won’t melt at all.
Stir constantly when adding the cheese. This distributes the heat evenly and helps everything melt uniformly. If you see clumps forming, add a splash of cream or milk and keep stirring. The extra liquid helps the cheese loosen up.
Don’t use pre-shredded cheese if you can avoid it. Those convenient bags of shredded cheese contain cellulose (wood pulp, essentially) and other additives to prevent clumping in the bag. Unfortunately, these same additives prevent the cheese from melting smoothly in your recipe. Grating your own cheese takes an extra three minutes but makes a huge difference in the final texture.
Popular Variations to Try
Once you’ve mastered the basic cheesy rice recipe, the fun really begins. These variations show just how versatile this dish can be.
Mexican Cheesy Rice
This version is probably my most requested recipe. It’s got all the flavors of Mexican food wrapped up in a cozy rice dish.
Start with your basic cheesy rice recipe, but swap the chicken broth for chicken stock mixed with a tablespoon of tomato paste. This gives the rice a subtle orange color and adds depth. When you add the cheese, use a mix of sharp cheddar and pepper jack instead of Monterey Jack for extra kick.
Stir in a cup of salsa (drain it first so your rice doesn’t get watery), a can of diced green chiles, a teaspoon of cumin, and half a teaspoon of chili powder. Fresh cilantro goes in at the very end, along with a squeeze of lime juice. The lime brightens everything up and cuts through the richness of the cheese.
Some people like adding black beans, corn, or diced tomatoes. All of these work great. Just make sure you drain canned ingredients well before adding them. Nobody wants soggy rice.
Broccoli Cheesy Rice
Adding vegetables to your cheesy rice turns it from a side dish into something closer to a complete meal. Broccoli is the most popular choice because it pairs so naturally with cheese.
Cut your broccoli into small florets, about bite-sized. You can either steam them separately and stir them into the finished cheesy rice, or add them during the last 5 minutes of cooking the rice. I prefer steaming separately because it gives you more control over the texture. Nobody likes mushy broccoli.
The cheese mixture stays the same, though I like to add an extra half cup of cheddar because the broccoli needs that extra cheesy coating. A pinch of nutmeg might sound weird, but it’s a classic pairing with both cheese and broccoli. Just a tiny pinch, though. You want to barely taste it.
Cauliflower works just as well as broccoli. So do peas, diced carrots, or bell peppers. Mix and match based on what you have in your fridge or what your family actually eats.
Chicken Cheesy Rice Casserole
This is where cheesy rice becomes dinner, not just a side. It’s hearty, filling, and perfect for feeding a crowd.
Cook your rice as usual. While that’s happening, cook about 2 pounds of chicken breast. You can grill it, bake it, or even use rotisserie chicken from the store. Cut the cooked chicken into bite-sized cubes.
Mix your cheesy rice together, then fold in the chicken pieces. Transfer everything to a greased 9×13 inch baking dish. Top with another cup of shredded cheese and some crushed crackers or breadcrumbs for crunch.
Bake at 350°F for about 20 minutes, until the top is golden and the cheese is bubbly. Let it rest for 5 minutes before serving. This casserole version is excellent for meal prep. Make it on Sunday, portion it out, and you’ve got lunch sorted for the week.
Bacon Cheesy Rice
Everything is better with bacon, right? This version is definitely not the healthiest option, but it’s absolutely delicious for special occasions or when you need serious comfort food.
Cook 6 to 8 strips of bacon until crispy. Let them drain on paper towels, then crumble them into small pieces. Save about 2 tablespoons of the bacon fat.
Make your cheesy rice as usual, but use the bacon fat instead of butter when cooking the rice. It adds a smoky, savory flavor that’s incredible. When you mix in the cheese at the end, fold in most of the crumbled bacon, saving some for topping.
Chopped green onions are perfect with bacon cheesy rice. The fresh, sharp flavor balances out all that richness. Sprinkle them on top right before serving along with the remaining bacon pieces.
Creamy Parmesan Rice
This Italian-inspired version is a bit more elegant than the standard cheddar-based recipe. It’s great when you want something that feels a little fancier.
Replace the cheddar and Monterey Jack with 1 and a half cups of freshly grated Parmesan cheese. Add half a cup of mozzarella for creaminess. Increase the cream to half a cup because Parmesan is drier than other cheeses.
Season with Italian herbs: oregano, basil, and a tiny bit of thyme. A clove of minced fresh garlic (not powder this time) makes it even better. Stir in some baby spinach at the end. The hot rice wilts it perfectly.
This version pairs beautifully with chicken piccata, grilled salmon, or roasted vegetables. It’s sophisticated enough for dinner parties but still simple enough for weeknights.
Quick Customization Ideas
You don’t need a full recipe to make your cheesy rice your own. Here are some easy add-ins that take about 30 seconds:
Stir in a spoonful of Dijon mustard for tang. Add a dash of hot sauce for heat. Mix in some frozen peas or corn (no need to cook them first; the hot rice will warm them through). Throw in some canned diced tomatoes with green chiles for Tex-Mex flavor. Top with crispy fried onions for crunch.
The possibilities really are endless. Think of the basic cheesy rice recipe as your canvas, and these variations as your paint.
Nutritional Information and Making It Healthier
Let’s be honest about what we’re eating. Cheesy rice is comfort food, and comfort food typically isn’t a diet dish. But understanding the nutrition helps you make informed choices, and there are definitely ways to lighten it up if that’s important to you.
Basic Nutritional Breakdown
A typical serving of classic cheesy rice (about 1 cup) contains approximately:
- Calories: 380-420
- Fat: 18-22 grams
- Saturated fat: 11-13 grams
- Carbohydrates: 42-45 grams
- Fiber: 1-2 grams
- Protein: 14-16 grams
- Sodium: 620-750 mg
- Calcium: 300-350 mg
These numbers vary based on exactly which cheeses you use and how much cream or butter you add. The cheese provides most of the protein and calcium, which are the nutritional bright spots. The saturated fat and sodium are the main concerns if you’re watching those.
White rice has a high glycemic index, meaning it can spike your blood sugar pretty quickly. That’s worth knowing if you’re managing diabetes or trying to keep your energy levels steady throughout the day.
Healthier Ingredient Swaps
You can make cheesy rice significantly lighter without sacrificing too much flavor. Here’s how.
Use brown rice instead of white rice. Brown rice has the bran and germ intact, giving you more fiber, vitamins, and minerals. It has a lower glycemic index too, so it won’t spike your blood sugar as dramatically. The trade-off is a chewier texture and nuttier flavor, but many people actually prefer it.
Try cauliflower rice for a low-carb option. Cauliflower rice has become really popular, and it works surprisingly well in cheesy rice recipes. One cup of cauliflower rice has only about 25 calories and 5 grams of carbs compared to 200 calories and 45 grams of carbs in regular rice. The texture is obviously different, but when you cover it in cheese, it’s honestly pretty satisfying. You’ll need to cook it separately first, drain it really well (cauliflower holds a lot of water), then mix in your cheese while it’s hot.
Choose reduced-fat cheese. This is probably the most controversial swap because cheese lovers can usually tell the difference. Reduced-fat cheese doesn’t melt quite as smoothly, and the flavor isn’t as rich. But if you’re trying to cut calories, it does help. You can save about 60 to 80 calories per serving by using reduced-fat cheddar instead of regular. I’d suggest mixing half regular and half reduced-fat rather than going all reduced-fat. You get some of the benefits without completely sacrificing texture.
Replace heavy cream with Greek yogurt. Plain Greek yogurt adds creaminess with way less fat and more protein than heavy cream. Use about half a cup of Greek yogurt in place of the cream. Stir it in after you remove the rice from heat, not while it’s still cooking, or it might curdle. The slight tanginess of yogurt actually works really well with cheese.
Cut back on butter. The butter in the original recipe adds richness, but you can reduce it by half and still get good results. Or use olive oil instead. It’s a healthier fat, though the flavor is different.
Add more vegetables. This doesn’t reduce calories, but it does increase the nutrient density and add fiber. More vegetables mean more volume, so you can eat a satisfying portion with fewer empty calories from just rice and cheese.
Making It Work for Different Diets
For vegetarians: The basic recipe is already vegetarian-friendly. Just make sure you’re using vegetable broth instead of chicken broth. Check your cheese labels too, since some cheeses contain animal rennet. Most supermarket cheeses are fine, but it’s worth checking if you’re strict about it.
For vegans: This requires more substantial changes, but it’s definitely doable. Use your favorite vegan cheese. Brands like Violife, Daiya, and Miyoko’s all melt reasonably well. Nutritional yeast adds extra cheesy flavor and B vitamins. Replace the butter with vegan butter or olive oil. Use plant-based milk instead of cream. The texture won’t be exactly the same as dairy-based cheesy rice, but it can still be really delicious. Season it well since vegan cheeses tend to be a bit milder.
For gluten-free diets: Good news. Rice and cheese are naturally gluten-free. Just double-check your broth and any seasonings to make sure they don’t have hidden gluten. Most do not, but it’s always smart to verify.
For lactose intolerance: If you’re lactose intolerant but can handle small amounts of dairy, aged cheeses like cheddar and Parmesan are lower in lactose than fresh cheeses. You might tolerate them fine. Otherwise, lactose-free cheese and milk products work great in this recipe. There are more options now than ever before.
Portion Control Tips
Cheesy rice is delicious, which makes it really easy to overeat. Here are some strategies that help:
Use smaller bowls. It sounds silly, but it works. A full smaller bowl feels more satisfying than a half-empty large bowl, even if they contain the same amount of food.
Pair it with lots of vegetables or a big salad. If cheesy rice is your side dish alongside roasted vegetables and grilled chicken, you’ll naturally eat less of it than if it’s the main event.
Wait 15 minutes before getting seconds. Give your body time to register that it’s full. You might find you don’t actually want more.
Make individual portions in ramekins if you’re doing the baked casserole version. This builds portion control right into the recipe.
Serving Suggestions and Perfect Pairings
Cheesy rice plays well with almost anything, but some combinations are particularly great.
What to Serve with Cheesy Rice
Grilled or roasted chicken is the classic pairing. The simplicity of plain seasoned chicken breast or thighs lets the cheesy rice shine. Try lemon pepper chicken, herb-roasted chicken, or even Nashville hot chicken if you want some heat. The cooling effect of the cheese balances spicy proteins really well.
Steak and cheesy rice together is steakhouse comfort food at home. A simple grilled ribeye or strip steak with salt and pepper needs nothing more than this creamy side. The richness of both components creates a seriously indulgent meal.
Pork chops work beautifully too. Whether you pan-fry them, grill them, or bake them with a simple glaze, pork and cheese are natural partners. The slight sweetness of pork complements the savory cheese.
Fish might seem like an odd choice with cheesy rice, but it actually works. Lighter fish like tilapia or cod balance out the richness. Salmon is especially good because its natural fattiness can stand up to the cheese. A piece of blackened salmon over Mexican cheesy rice is incredible.
Vegetable sides provide necessary balance when you’re serving rich cheesy rice. Roasted broccoli, green beans, asparagus, or a fresh garden salad all work. The vegetables add freshness and cut through the heaviness.
For a full vegetarian meal, serve your cheesy rice with black beans, sautéed peppers and onions, and a side of guacamole. Add some salsa and sour cream, and you’ve basically got a burrito bowl situation happening.
Best Occasions for Cheesy Rice
Weeknight dinners are where cheesy rice really shines. It’s fast, satisfying, and most people like it. When you’re tired and need something comforting without a lot of work, this is your answer.
Potlucks and parties are perfect for cheesy rice casserole. Make the baked version in a big dish, and it travels well. It stays warm for a while, and there’s never any left over. People always want the recipe.
Holiday meals can include cheesy rice as an alternative to traditional sides. Some people don’t love stuffing or prefer to have more variety. A creamy Parmesan rice casserole feels festive and works alongside turkey or ham.
Meal prep is much easier when you batch-cook cheesy rice. Make a big pot on Sunday, divide it into containers, and reheat throughout the week. Add different proteins or vegetables each day to keep it interesting.
Kid-friendly meals almost always benefit from including cheesy rice. Most children love it, making dinner battles much easier. You can sneak vegetables into it more successfully than into many other dishes.
Make-Ahead and Meal Prep Strategies
You can definitely make cheesy rice ahead of time, though it’s best fresh. Here’s how to do it right.
For same-day serving, make the rice up to 4 hours ahead. Keep it covered at room temperature if you’re within the 2-hour food safety window. For longer storage, refrigerate it. To reheat, add a splash of milk or broth and warm it gently on the stove or in the microwave. The liquid helps refresh the texture.
For meal prep, portion your cheesy rice into individual containers. Store them in the fridge for up to 4 days. Add a tablespoon of milk or broth to each container before sealing it. This gives you liquid to stir in when reheating, which prevents the rice from drying out.
If you’re making the casserole version, you can assemble it completely, cover it tightly with foil, and refrigerate for up to 24 hours before baking. Just add about 10 minutes to the baking time since it’s starting cold.
Don’t add delicate fresh ingredients like herbs or vegetables until serving time if you’re meal prepping. They’ll wilt and lose their appeal after a couple days. Add them fresh when you reheat.
Storage and Reheating Guide
Proper storage keeps your cheesy rice safe to eat and tasting good. Here’s everything you need to know.
Storing Leftovers in the Refrigerator
Let your cheesy rice cool to room temperature before refrigerating, but don’t leave it out for more than 2 hours. Bacteria grow rapidly in the danger zone between 40°F and 140°F.
Transfer the rice to an airtight container. Glass containers with tight lids work great. You can also use plastic containers or even freezer bags if you squeeze out the air.
Properly stored cheesy rice lasts 3 to 4 days in the refrigerator. After that, the quality declines and food safety becomes questionable. When in doubt, throw it out.
The rice will firm up and the cheese will solidify as it chills. This is completely normal. It’ll soften again when you reheat it.
Freezing Cheesy Rice
Freezing works, but the texture changes a bit. Rice releases moisture when frozen and thawed, so it can become slightly mushy. The cheese may also separate slightly. Despite these minor issues, frozen cheesy rice is still totally edible and convenient.
Portion the cooled rice into freezer-safe containers or heavy-duty freezer bags. Remove as much air as possible to prevent freezer burn. Label each container with the date.
Frozen cheesy rice keeps for about 2 months. After that, it’s still safe to eat but the quality really starts to go downhill.
Thaw frozen cheesy rice in the refrigerator overnight before reheating. You can also reheat it directly from frozen, though it takes longer and requires more careful stirring to heat evenly.
Best Reheating Methods
Stovetop reheating gives you the most control and usually the best results. Put the refrigerated rice in a saucepan over medium-low heat. Add 2 to 3 tablespoons of milk, broth, or water. Stir frequently as it warms. The added liquid helps restore creaminess. This takes about 5 to 7 minutes for a full pot.
Microwave reheating is faster and more convenient. Put the rice in a microwave-safe bowl. Add a tablespoon of milk or water. Cover the bowl with a damp paper towel or microwave-safe lid. Heat on 50% power in 1-minute intervals, stirring between each interval. This prevents hot spots and helps the rice heat evenly. A single serving usually takes 2 to 3 minutes total.
Oven reheating works best for casserole-style cheesy rice. Transfer the rice to an oven-safe dish if it isn’t already in one. Add a bit of milk or broth and stir it through. Cover with foil and bake at 350°F for 15 to 20 minutes, until heated through. Remove the foil for the last 5 minutes if you want the top to get a bit crispy.
Refreshing Dried-Out Leftovers
Sometimes leftover cheesy rice gets dry and clumpy no matter how carefully you stored it. Don’t give up on it.
Transfer it to a pot. Add a generous amount of liquid, maybe a quarter to a half cup depending on how much rice you have. Use milk for extra creaminess, or broth for a lighter result.
Heat it over medium-low, stirring constantly. As the rice warms and absorbs the liquid, it’ll soften and come back to life. If it’s still too dry, add more liquid a tablespoon at a time.
You can also stir in a bit more cheese. Fresh cheese melted into dried-out rice helps bind everything together again and adds back some of that creamy texture.
Common Mistakes and How to Fix Them
Even simple recipes can go wrong. Here are the most common issues people run into with cheesy rice and how to avoid or fix them.
Grainy or Separated Cheese
This is the number one complaint. The cheese looked perfect when you stirred it in, but now it’s grainy and weird-looking.
Why it happens: Cheese contains proteins that can tighten up when exposed to high heat. When cheese gets too hot too fast, these proteins squeeze together and push out the fat and moisture. That’s what causes the grainy texture and separated appearance.
Prevention: Remove the rice from heat completely before adding cheese. Let it sit for about 30 seconds after removing from heat. This slight cooling prevents the cheese from seizing. Add cheese gradually, not all at once. Stir constantly as you add it.
The fix: If your cheese has already gone grainy, don’t panic. Add a tablespoon of cream or milk and stir vigorously. The extra liquid and agitation can help bring the cheese back together. If that doesn’t work, add a bit of cream cheese. Its emulsifiers help smooth everything out.
Rice That’s Too Dry or Too Mushy
Getting rice texture right can be tricky, especially when you’re adding other ingredients.
Too dry: This usually means either you didn’t use enough liquid when cooking the rice, or too much liquid evaporated during cooking. Make sure you’re measuring accurately and using the right rice-to-liquid ratio (usually 1 part rice to 1.5 to 2 parts liquid for white rice). Keep the lid on tight during cooking so steam doesn’t escape.
If your finished cheesy rice is too dry, stir in milk, cream, or broth a tablespoon at a time until you reach the consistency you want. Let it sit for a minute so the rice absorbs the liquid.
Too mushy: This happens when you use too much liquid or overcook the rice. Mushy rice can’t really be fixed, unfortunately. You can try spreading it on a baking sheet and letting excess moisture evaporate for a few minutes, but the texture won’t be perfect. Next time, measure your liquid more carefully and don’t cook it as long.
Clumpy, Stuck-Together Rice
Nobody wants a solid brick of rice with cheese trapped in the middle.
Prevention: Rinse your rice before cooking. This removes surface starch that causes clumping. After cooking, fluff the rice with a fork before adding cheese. This separates the grains. When you add cheese, don’t just plop it in one spot. Distribute it over the surface so it melts evenly.
The fix: If your rice is already clumpy, add liquid and break it up with a fork or your spoon as you stir. Be patient and keep working at it. The liquid will help loosen the clumps.
Bland Flavor
Sometimes your cheesy rice just tastes flat and boring, even though you followed the recipe.
Why it happens: You didn’t season enough. Cheese is salty, yes, but rice absorbs a lot of salt. What tastes over-seasoned when you’re cooking often tastes perfect once it’s mixed with rice. Also, using water instead of broth means you’re missing a whole layer of flavor.
Prevention: Always taste your food before serving. Add salt gradually until it tastes bright and flavorful. Use broth instead of water for cooking the rice. Don’t skip the garlic powder and onion powder. A little bit of acid (lemon juice or a splash of vinegar) brightens flavors dramatically.
The fix: Stir in more seasoning. Salt first, then taste. Add garlic powder, onion powder, or whatever seasonings fit your flavor profile. A squeeze of fresh lemon juice or lime juice can wake everything up. Grated Parmesan adds both saltiness and umami, making the whole dish taste richer.
Sauce Separating or Looking Oily
Sometimes the cheese and fat separate, leaving you with oily rice and clumps of cheese instead of a unified creamy dish.
Why it happens: This is usually a temperature problem, similar to grainy cheese. It can also happen if you use pre-shredded cheese with lots of additives, or if your cheese-to-liquid ratio is off.
Prevention: Use freshly grated cheese. Remove from heat before adding cheese. Stir constantly. Make sure you have enough liquid to create a smooth sauce.
The fix: Add a bit of cream cheese or a splash of milk. Stir vigorously. The emulsifiers in cream cheese help bring separated mixtures back together. If it’s really bad, you might need to add a tablespoon of cornstarch mixed with cold milk, stir it in, and heat gently to help everything bind together again.
Rice Sticking to the Bottom of the Pot
Burnt rice on the bottom ruins everything and makes cleanup a nightmare.
Prevention: Use medium-low heat, not high heat, when cooking rice. Don’t skip the butter or oil at the beginning, as fat helps prevent sticking. Make sure you’re using enough liquid. Stir once before covering, then resist the urge to stir again until it’s done.
The fix: If rice has stuck to the bottom, don’t scrape it off and mix it into the good rice. The burnt flavor will ruin the whole batch. Just avoid that bottom layer when serving. For the pot, fill it with hot water and dish soap and let it soak for an hour. The burnt rice will soften and scrub off much more easily.
Frequently Asked Questions
Can I use pre-cooked or leftover rice?
Yes, absolutely. This actually makes the recipe even faster. Use about 4 cups of cooked rice (which is roughly what 2 cups of uncooked rice yields). Heat it up first, either in the microwave or in a pan with a splash of water to add moisture. Once it’s hot and steamed, proceed with adding the cheese and other ingredients just like you would with freshly cooked rice. Cold rice straight from the fridge won’t melt the cheese properly, so warming it first is essential.
What’s the best cheese for melting?
Cheeses with higher moisture content and younger age melt better. Monterey Jack, young cheddar, fontina, and Gruyère all melt beautifully. American cheese (the real stuff, not processed cheese product) melts extremely well because it contains emulsifiers. Parmesan, aged cheddar, and other hard aged cheeses don’t melt as smoothly on their own, but they add incredible flavor when mixed with good melters like Monterey Jack.
How do I make my cheesy rice creamier?
Add more liquid. Heavy cream creates the richest texture, but whole milk works well too. Cream cheese is another secret weapon for creaminess. Start with 2 tablespoons and work up from there. More butter also increases creaminess, though it obviously adds calories. Using a combination of different cheeses, especially including a soft cheese like cream cheese, gives you better texture than using just one type.
Can I make this in a rice cooker?
Yes, and it’s actually super convenient. Cook the rice in your rice cooker according to the manufacturer’s instructions. When it’s done and switches to “warm” mode, stir in your cheese, butter, cream, and seasonings. The residual heat will melt everything. Stir well, let it sit for a few minutes, and you’re done. This works great because rice cookers are designed to maintain the perfect temperature for melting cheese without seizing.
Is cheesy rice gluten-free?
Rice and cheese are naturally gluten-free, so yes, this recipe is gluten-free as long as you’re careful about your other ingredients. Check your broth to make sure it doesn’t contain gluten. Most don’t, but some brands add flavorings that include wheat. Make sure any seasonings or spice mixes are certified gluten-free if you’re very sensitive. If you’re adding extras like bacon or chicken, check those too. Plain meat is fine, but some processed or pre-seasoned versions contain gluten.
How long does it take to make cheesy rice from start to finish?
About 25 to 30 minutes if you’re cooking the rice from scratch. The rice takes about 15 to 20 minutes to cook, plus 5 minutes of resting time, and then another 5 minutes to mix in the cheese and seasonings. If you’re using leftover rice, you can have cheesy rice on the table in about 10 minutes. The casserole version takes longer because of baking time, usually about 50 minutes total.
Can I double this recipe?
You can, but be careful. Most home pots can’t handle doubling a rice recipe without overcrowding. Overcrowded rice doesn’t cook evenly. If you need to make a lot, it’s better to make two separate batches. The casserole version doubles more easily because you just use a larger baking dish. A full-size steam table pan works great for feeding a crowd.
My rice turned out purple/pink. What happened?
Don’t worry, you didn’t poison anyone. This can happen with certain types of rice and is caused by a reaction between the rice and the minerals in your water. It’s completely harmless. Using filtered water instead of tap water usually prevents this. The color doesn’t affect the taste at all.
Cheesy Rice Nutrition Comparison Table
Here’s a helpful comparison showing how different modifications affect the nutritional content of one cup of cheesy rice:
| Version | Calories | Fat (g) | Carbs (g) | Protein (g) | Fiber (g) |
|---|---|---|---|---|---|
| Classic White Rice | 400 | 20 | 43 | 15 | 1 |
| Brown Rice Version | 420 | 20 | 48 | 16 | 4 |
| Reduced-Fat | 320 | 12 | 44 | 14 | 1 |
| Cauliflower Rice | 220 | 18 | 8 | 13 | 3 |
| With Vegetables | 380 | 18 | 42 | 15 | 3 |
| Greek Yogurt Swap | 350 | 14 | 44 | 17 | 1 |
Note: Values are approximate and vary based on specific ingredients and portions used.
This table shows that you have quite a bit of flexibility depending on your dietary goals. The cauliflower rice version cuts carbs dramatically while keeping protein reasonable. The brown rice version adds fiber without too many extra calories. The reduced-fat version saves about 80 calories per serving, which adds up if you’re watching your intake closely.
Final Thoughts
Making perfect cheesy rice isn’t complicated, but like most simple things, the details matter. Use good quality cheese and grate it yourself. Take the pot off the heat before adding the cheese. Season generously. These small steps make the difference between mediocre cheesy rice and the kind that makes people ask for seconds.
What I love most about this recipe is how forgiving and adaptable it is. Forgot to buy Monterey Jack? Use all cheddar. Don’t have heavy cream? Milk works fine. Want to add vegetables? Go ahead. Need to make it healthier? Plenty of options for that too. There’s really no wrong way to make cheesy rice as long as you follow the basic principles.
This is the kind of recipe that becomes a staple in your cooking rotation. It’s there for you on busy Tuesday nights when you need dinner fast. It shows up at family gatherings. It helps you use up odds and ends from the fridge. And it makes people happy, which is really what good food is all about.
Start with the classic recipe I shared. Make it a few times until you’ve got the technique down. Then start experimenting. Try the variations. Make up your own. Find your perfect version. Before long, you won’t even need to look at the recipe anymore. You’ll just know how to make great cheesy rice.
Now stop reading and go make some. Your stomach will thank you.